November 30, 2010

Candle Boxes

Hello everyone, I have another Christmas gift project to share today.  Every year I get the girls in the office something for Christmas.  This is their gift this year.

Kelly Lunceford has done up some really cute boxes and so this is where I got my idea.  Kraft cardstock and Rustic Snowflakes paper collection was used to create my boxes.

The tops were tied up with ribbon, tulle, button and bakers twine.

 For the fronts I die cut a piece of kraft cardstock with a PTI die, then stamps snowflakes from the Snowfall set in fresh snow and added Martha Stewarts tinsel glitter around the edges.  I created a double ended banner and stamped the sentiment from Tree Trimming Trio in pure poppy and attached it with some pop dots.

For the inside I added kraft tissue paper to prevent the jar candle from bouncing around.  I made 9 of these boxes.  I had fun mix and matching the paper and all the trimmings.

Thanks for stopping by.

November 29, 2010

Tissue Box

I found a tutorial on SCS on how to make a tissue box sleeve.  I decided to make a Christmas box for my mother to set on the table next to her easy chair.

 I used kraft cardstock for the base and then added pattern paper which I had in my stash that was bought at JoAnn's a few years back. 

I used a Fiskar's border punch to add some red trim.  For the focal image I use Nesties to cut out the red and kraft cardstock.  The holly image sticker I picked up at Michael's. 


I used a PTI die to cut out an opening for the top.  I was surprised at how quickly this all came together.  I know I will be making more of these in the future.

November 28, 2010

Tussie Mussie

Well the halls are all decked and most of my handmade Christmas gifts are made, I just have a couple of odds and ends to finish up.  I still have some store bought gifts to get which I'll be taking a week off from work the first part of December and I'm hoping to finish everything up by then.  I hate waiting till the last minute to hit the stores, I just can't stand the crowds.  Anyway, I have a little project to share with you this evening. 

 This is a tussie mussie I made for the Christmas tree.  The paper I used is from Cosmo Crickets Oh Joy line.

 I picked up a cardinal from a local craft store as well as the gold sprig and the gold trim is from JoAnn's.

I added some gold glitter around the medallion and the sticker is from Melissa France.  At the bottom of the mussie I also added a gold jingle bell.

Thanks for visiting and I'll be back to share another project with you soon.

November 25, 2010

November PTI Blog Hop Challenge


Happy Thanksgiving to all my USA family and friends.

This month's challenge for Papertrey Ink's blog hop is to design holiday tags.  I have been waiting for a challenge like this and am looking forward to seeing everyone's designs.  I actually made these before the challenge was posted and was going to post these earlier then decided to wait and use them for the hop.  Here's is a group photo of all ten tags but scroll down to see their close ups.


Thanks for visiting and happy hopping.

November 22, 2010

believe

Well you know I can't go through the Christmas holiday without a banner.


The patterned paper used for this project is Cosmo Cricket's Oh Joy collection.   I like how there is a patterned on both sides of the paper and what a nice thick quality it has to it. 


I added gold glitter around all the medallions and at the top of each panel to match the glittered letters which are from Making Memories.  I created a strip of words on my computer to go with the season and  attached it to the front of a strip I made using Background Basics Text Style. 


I then punched holes to the corners of all the panels and tied some gold jingles bells with some silk ribbon.

 
 To each end of the banner I added some chipboard trees that I painted and added glitter to.

It's hard to believe that a week from today I will be decorating the house for Christmas.  Where has the time gone. 

Thanks for visiting.

November 21, 2010

Happy Brithday

Happy Sunday Everyone!  I hope your having a wonderful weekend.  I have a little birthday card to share with you today that I made for my nephew's 8th birthday.  I was inspired by a card Nichole Heady made a few months ago featuring PTI's new star dies. 

 Here I cut red felt with the largest die, the middle star from summer sunrise cardstock and the smallest with simply chartreuse cardstock then I stamped a polka dot star image from Star Prints with versemark ink.  The white cardstock was run through my Cuttlebug using the swiss dots embossing folder.  I embossed the top part and the bottom leaving a space towards the bottom blank so that I could stamp my sentiment which is from Birthday Basics.  I ran a score line above and below the sentiment with my Scor Pal.  I then attached two little rhinestones with my glue pen.  The card base is enchanted evening cardstock.


Lastly, I added a button to the middle of the star.  Thanks for stopping by and enjoy the rest of your weekend.

November 20, 2010

DVD tin organizer

Here are some more gifts I made for my sisters that will go into their totes I made for them.   I made them each a DVD tin organizer and a pack of note/thank you cards.  WARNING:  there are lot of photos in this post, so  I'll do all the talking here then let you scroll through the photos.  For the inside of the tins I created a calendar on the computer along with a contact sheet and tabs for the pouches.  The pouches were made by using two sheets of cardstock cut in half long ways then folded  in half then I glues the sides together. this will make four pouches.  The deepest pouch is 5.5" then I cut down each pouch every half inch.  So the shortest pouch measures 4".  I adhered the bottoms of the pouches together then glued them to the tin.  The calendar measures 4.75" x 6.75", I added patterned paper to the back and wrapping to the front top and cut off at 1/2" then stapled everything together.  On the back of the calendar I glued a magnetic strip so that the calendar can be easily removed.  The stamp sets used are giga guidelines, Wreath for all seasons, and everyday blessing.  I used embossing folders for Cuttlebugs, Quickutz and PTI impression plates.  The acetate boxes are also from PTI.


Thank You for taking the time to stop by.

November 19, 2010

Gift Card Pouches

I got this idea from Ashley Newell last week in her Watch Me Wednesday video.  I was looking for something different and unique for my gift cards and loved this idea.


I decided that this year all of my wrapping will be done in creams, reds and kraft which is why I chose the colors for the pouches.  I used cream felt to create a pouch that is 5" x 5".  Before sewing up the three sides I ran the front panel through my Cuttlebug with a Nesties die to add a little interest.


The inside panel was made from kraft cardstock.  I stamped snowflakes from the Snowfall set in vintage cream.  I cut a piece of red felt from a nesties die and glued to the top then wrapped some red bakers twine around and tied a bow.  To hold the gift card in place I used my Notch Die cutting tool by Basic Gey.  I love how the Macy's gift card coordinates with the packaging.

To decorate the outside of the pouch I wrapped a piece of lace around the entire pouch and glued in the front then wrapped some pure poppy twill ribbon and tied in a knot.  I then tied 2 red jingle bells with some red bakers twine and tied it around the ribbon.  The red glitter sprig I picked up at Walmart in the Christmas section.  They had those in a lot of different colors.  I snipped a piece off and glued it behind the ribbon.  I die cut a piece of kraft cardstock using Mat Stack I die.  The flourish image is from Vintage Labels that I formed into a curve to match the die cut.  The sentiment is from Tree Trimming Trio all stamped in Pure Poppy ink.

I think I may put the pouches in a large glassine bag but I haven't figured out yet how I want to design the outside of the bag.  After the holidays I may make some more of these pouches to have on hand for birthdays, baby showers and weddings.

November 18, 2010

Merry Christmas

This is my design for this years Christmas cards.  I used non traditional colors this year and was inspired by a card Dawn McVey designed last year.


I used sweet blush and vintage cream cardstock.   An image from Giga Guidelines was stamped in Versa Magic chalk ink in wheat to created the background.  The same ink was used for the sentiment and the image inside the ornament which are from Vintage Ornaments.  The ornament was stamped in sweet blush.


 I had these cards made before PTI came out with the dies to go with the Vintage Ornamnet stamp set.  I added Martha Stewarts crystal fine glitter to the ornament using a glue pen then added a pearl in the center.  I also ran a strip of scor tape at the top of the sweet blush decorative strip and added some more glitter.  The ribbon is from my stash.  I just love how these turned out and a big thank you to Dawn for the inspiration.

November 17, 2010

Holiday Wishes

This is the Christmas card design I made for my mother's Christmas cards this year.  I needed to make sure that they did not have embellishments that would require extra postage. 


I used vintage cream cardstock, a cream shimmery cardstock for the mat behind the focal image.  The focal image stamp is from Demani Design that I've had for quite some time.  I used ColorBox ink in cranberry then embossed with clear EB.  The sentiment is from Tree Trimming Trio stamped in the same color and embossed.  It's a simple but elegant design.

Thanks for visiting.

November 15, 2010

Burlap Tote

I made my sisters tote bags as part of their Christmas gift.  I will be filling them with lots of goodies made and bought. 

For the fabric I used burlap for the outside and canvas for the lining.  I'll have to explain why I used the burlap.  Back when I was into making and selling candles, I would do craft shows and my booth decor was primitive country.  I used tea stained muslin to cover the tables and over top I used burlap (that was my sister's idea).  Well now that I don't sell candles any more I have all this burlap laying around.  I've searched the net for ideas that I can use the burlap for.  I came across a tote bag made from burlap and the light bulb went on.

The tote measures 17" across and is about 17" deep.  The handles are 26" from end to end.


I wanted the tote to have a natural feel to it so I decided to use canvas for the lining.  The tote it very sturdy using both fabrics.


The tote looked very plain and I wanted to add a little feminine touch so I made these fabric rolled flowers.  I added pins on the back of each flower so they can be removed and worn on a shirt or jacket.


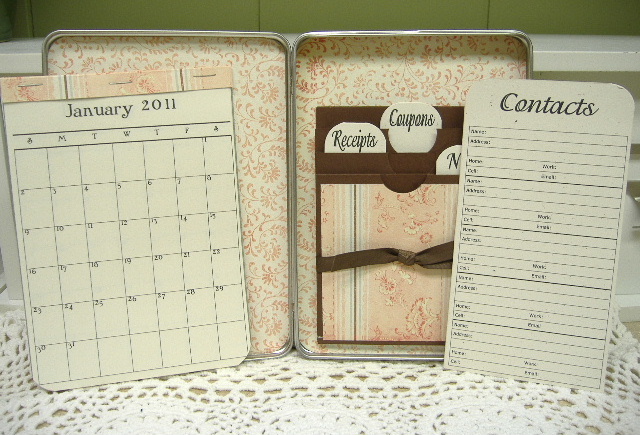
I also made an organizer that can be removed and used in another bag.  I used the same canvas that was used for the lining.


I made smaller pouches for the outside so you can put your cell phone, lipstick or any smaller items and then one large pouch.


I filled my sister's pouches with lots of things to pamper them with.  In the days to come I'll show you some other things I made that will go into the totes.  Till then, thanks for visiting!